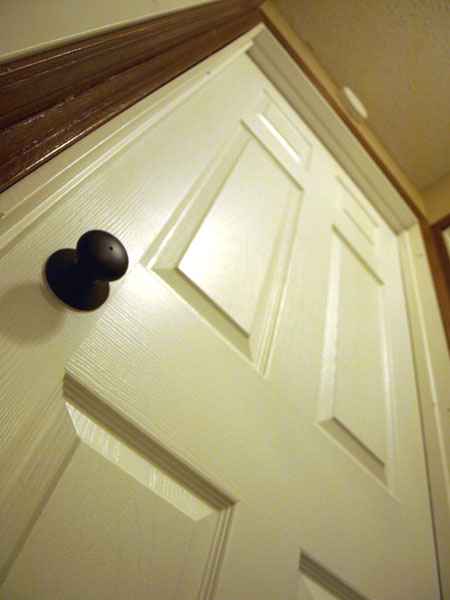
Showing posts with label paint it. Show all posts

Monday, October 1, 2012

The Mailbox

Oh. Hi. Yes, I'm still alive. In fact, I'm just going to jump right into this post and pretend like I haven't skipped almost an entire year (!!!).

Here is our old mailbox. It was looking a little sad.
The old mailbox.
I decided to paint it (of course). I love it now! I used Rustoleum's oil-rubbed bronze spray paint on the mailbox and pure white (Behr's external paint) for the post. I was concerned about how it would hold up, since I haven't painted much that stays outside year-round, but it is still in perfect shape four months later. (We'll see how it does with a Midwestern winter, though!)

New and improved mailbox!
I bought three stainless steel buckets at an antique store and planted petunias in them (they're actually still mostly alive, even though it's October). Last fall, before painting, I put in the brick surround and planted tulips. When they died off in early spring, I added the buckets in their place.

Spring tulips.
I'm hoping the tulips come back this spring!

Wednesday, November 2, 2011

Laundry Room Redo

I was inspired by YHL's Pinterest Challenge to finally write up a project that we finished a few weeks ago. This was my inspiration for our laundry area:


Ha ha... it looks nothing like this. But, it was inspiring! I love the apron sink and the granite counter tops. Unfortunately, our laundry isn't even in a room. It's just a little closet off of our kitchen (with no space for a sink or counter top). We hadn't made any updates to it since we moved in, when it had a couple of particle-board shelves and a poor paint job. This isn't quite a before photo, but almost (we'd already taken the shelves out... they were disgusting!):


We had already decided that we wanted to hang some cabinets instead of shelves, but had a very limited budget. Enter the Habitat for Humanity ReStore! We picked up these three doorless cabinets for $10 total:


We painted the walls and the cabinets white, which really cleaned up the space. Unsurprisingly, the cats loved the open shelving.


To finish it off, I added pull-out baskets to the top cabinets and sewed a little skirt for the bottom cabinet. We keep our detergent, bleach, and softener in there, so it's nicely hidden out of sight. The top baskets hold additional laundry stuff, plus painting supplies. We love extra storage space!

Saturday, September 3, 2011

Front Door Paint Job

I got the biggest item already checked off my list for this weekend. On Friday, I painted our front door to match our new shutters. As you may remember from that post, the door was really ugly:


Here it is now with the new paint job:

It's not amazing (it's still a plain, six-panel door), but it does make a big difference on our little house. If you too need to paint a door (or anything else...) here are my tips from this project: 

1. For six-panel doors, it's always good to follow the directions (like Pretty Handy Girl's, here) instead of just painting the whole thing in a random order like I tried to do on the first coat. Things start to dry out of order and you risk pulling up partially dried paint otherwise (super hot weather made this even worse!).

2. Always read the product's instructions before you use it. I was using a Pittsburg Paint exterior product that was supposed to have "paint and primer in one." I read it in the store; it said it was OK for metal. No problem! Then, when I re-read it immediately before using it, it said to "prime metal surfaces with the appropriate primer before using." Oh. That brings us to tip #3...

3. Have lots and lots of tools/paint/brushes/stuff in your house. Seriously, deciding to prime the door at the last minute was no big deal, because I own at least four different types of primer. Yeah, I might have a problem. I ended up using a spray-on oil-based primer, which was awesome — it was easy and I didn't have to clean any brushes!

Probably the most hilarious part of this project was deciding how to take the door off to paint it, since I wanted to lay it flat across sawhorses in the garage while I worked. Leaving a gaping hole in the front of our house for 8 hours was a problem due to bugs, weather, cats, etc., and we currently have no storm door. We ended up taking the door off the back of the garage to put in its place, since it was 100+ degrees yesterday and I needed to keep the AC going. It was exactly the same size and color, so I'm not sure our neighbors even noticed. The hinges were on the wrong side, though, so we just pushed a recliner up against it (from the inside of the house) to hold it up. Somehow, it worked wonderfully!

Sunday, August 21, 2011

Installing Our Last Door!

Here it is: our brand new guest room door!


Today we installed our last (new) door! We've been working on this project for over a year, starting with the bathroom door in early 2010. We still had two to go and were able to wrap them up over the last two weekends. Now our office and guest room also have matching six-panel white doors:


On the right, you can see the non-paneled door to our linen closet, which we painted last week after finally finding the correct paint color. We are planning to paint all of the similar closet doors to match instead of tearing them all out, since most of them are not in terrible shape, and it will save money over buying new ones. Here's what they currently look like (this is our kitchen pantry door):


Next, we'll be painting all of the trim white to match! I'm excited for this part (I like to paint stuff), especially since I think we will see a big impact for a low cost.

Wednesday, August 10, 2011

Summer Fun

It's already starting to feel like fall--the last two days have been in the upper 70s instead of the 90s! But we're still wrapping up our super busy summer. We headed up to Rockford on July 23 for Art and Becky's wedding, where Adam reunited with the Posse:


Adam then went to Madison for a few days for a work-related seminar, while I hung out in Roscoe. After that, we headed up to Three Lakes, Wis., for some vacation time with his family. Now we're finally back home and not planning on traveling any time soon... this summer has worn us out. Luckily, other people seem to be traveling in our direction (Anne and Brian, Becky and Sam)!! Which is always super exciting. 

On the home improvement front, we've been stalled for some time due to travel and financial constraints. But now that we're back for a while--and since we've had a long break--we're excited to get started on some more projects. We have two more bedroom doors to install (we've been at this point for... approximately a year. Oops. See our first door installation here). We probably would have had them done by now, but when we went to Menards this weekend, they were sold out of the ones we needed! Instead, we spent last weekend buying paint that matches our existing doors so that we can make the trim the same color. We're also going to try painting some of the doors we don't want to replace: our linen closet, pantry, and entry closet doors.

We're using Pittsburg Paint for these, since that was the brand that the pre-painted doors came with. It matched wonderfully (even though it wasn't exactly the same), so we went with it. Seems to be working so far: 


We did prime before we painted, although we just went with a water-based primer... we decided that the doors weren't "real" wood (they're hollow and plywood-y feeling. Yes, that's the technical term.), so we just winged it with water-based primer, since it's soooo much easier to deal with. The bleed-through hasn't been bad so far (sometimes you can still see wood-colored stains through the paint, unless you use an oil-based product), so I am hoping that it will stay that way. I just finished the final coat of paint on that door, which is for the linen closet, so I am hoping we can put it up tomorrow and see how it looks!

Thursday, June 2, 2011

Picture frames and cabin trip

When we first moved in, I put up these five pictures: Us, friends, and cats. But since then, it's really looked a little sparse.

Inspired by YHL's gallery of frames project, I started collecting frames from garage and thrift sales. I bought several at a "barn" sale in Bloomington earlier this spring, and spray painted them black to match our existing frames (with feline assistance, of course):

No before picture for those--but they were all ugly to start with, so much better now!

We took a trip to visit my parents' cabin in northern Wisconsin over Memorial Day weekend, and stopped at a few garage sales while we were up there. I picked up even more frames there (although I forgot them in Roscoe), so I'll be painting them soon. Eventually I'd like to cover the whole wall.

Our trip up north was fun--great weather, Friday night fish fry, went out on the boat, and rode the ATVs! Here's the view from the front yard:


And Adam on the dock:


We spent a lot of time playing with our digital SLR camera. We got it as a wedding present from Adam's parents and have been using it for the past three years, but are just now figuring out how to change the more advanced settings. It was pretty fun to see what you can actually do, but we've still got a lot to learn.

Sunday, May 22, 2011

Coffee table refinishing

We've been busy with lots of projects lately, so I'm going to start doing more posts to keep up!

I recently decided to refinish the top of our coffee table. The cats had scratched it up pretty badly, and since we often eat on it (instead of our kitchen table), it had suffered a lot of abuse. Here's what it looked like before, courtesy of a December 2009 posting, when we had first started painting our walls:


I decided to go with a black stain for the top instead of trying to match the existing color. I chose Minwax ebony stain, and then used Minwax fast-drying polyurethane in satin for the topcoat (I actually did three coats on this, since I had only done two on the kitchen table and later wished I had all three). Here it is in the garage, waiting to come in:

It's nice to have it back in the family room now. We'll see how it holds up to kitty claws... Meanwhile, outside, the clematises that I planted last spring are really taking off this year:

It's really exciting to see everything I planted last year come back even stronger and healthier this year!

Tuesday, March 29, 2011

DIY Chandelier

We've been thinking for some time about replacing the light over our kitchen table. The one that came with our house was fine, but was more of a ceiling mount deal (below) than the chandelier you might expect over the main dining area in the house.

We had looked somewhat for a new light, but hadn't seen anything too exciting. I decided it would be fun to try and redo one that I found at our local Habitat for Humanity ReStore. I am in looove with ours... cheap house-ish stuff! So cool! It's like a thrift store for your house. My plan: buy a light fixture with a shape I liked, then paint it whatever color we wanted. We picked out this gold one:

We picked out RustOleum Dark Bronze Hammered spray paint for this project. We used the black color, same brand, for our patio set and really liked it. I hung the light from the garage ceiling so I could spray it from all sides. I was going for an "oil rubbed bronze" look, but got more of a gray instead. Actually though, I really like it -- it doesn't match everything else in our house, which makes it look unique.

But, to skip back a step, we had never hung a chandelier before. It took us a few minutes to figure out how to shorten the length; basically, remove the chain links you don't want (they aren't solid, so you can pry them apart with pliers), and then pull the cord up and trim it. Here's Adam in action with the pliers:

But, the very, very best part was the PRICE. Everything at ReStore is used (and generally donated), so it is very inexpensive. This light had been there for a while, so it was marked down to $7.50. The spray paint was about $6.50. So total cost for this lamp: $14! Amazing. Because of that, we ended up splurging on the light bulbs. I wasn't sure what kind I wanted (it came with a couple different, non-matching bulbs, but we didn't like any of them). Then we saw these at Lowe's and had to have them! They were almost $4 apiece, so that brought our total light fixture cost up to $34... still not bad!

One thing we should have considered: since this hangs over the kitchen table, the cats can reach it. And Jack loves swatting it... uh oh.

Tuesday, January 25, 2011

More painting!

Saturday morning, we got up and decided that it would be a good idea to paint our guest bedroom. This is why:

Formerly a child's bedroom, it was all decked out in dark blue and bright orange (not sure if he was a Bears fan or an Illinois fan...) We weren't sure what color to go with, but ended up going with "Chocolate Froth" from Behr. It's definitely a lot more neutral than before:

We've now painted almost every wall in our house. Still up: the bathroom and the office, both of which are OK colors. But I think we'll still paint them :) No more orange walls left, though! Whew.

Monday, October 25, 2010

Refinishing a Kitchen Table, Part 2

The kitchen table is finally finished, and moved back into the kitchen tonight! Here are photos from the rest of the process. After stripping off the old varnish and stain, I was down to bare wood. Then I sanded and stained. These two pieces below are the two leaves; the one on the left has the stain already wiped off. On the right, it's still waiting to be taken off.


After two coats of stain, I did two coats of oil-based polyurethane over the top. You can see it below, where the tabletop is shiny! Next, I primed the legs and sides of the table that I was planning on painting black. I used oil-based primer, too, as water-based products can "raise the grain" of the wood. (Shout-out here to YHL, whose furniture painting tutorial provides much of my inspiration for these types of projects!) As they point out, you can totally use a latex paint over an oil-based primer.

I used Behr's paint/primer combination paint for the legs (we've used this stuff a lot on walls, and it's fabulous). The color is actually Black Onyx from Glidden. But The Home Depot will mix up whatever you want for you, so you can switch back and forth with their brands, which is nice. After a couple coats of paint, I put on a coat of water-based polycrylic finish to make the rest shiny... and here's the finished result!

The cats enjoyed checking it out... it was sort of like they totally forgot what a kitchen table was. Guess it was out in the garage for too long! :)

We're glad that we are now going to be able to park in the garage, too--just in time for cooler weather!

Friday, August 20, 2010

Bedroom Makeover

This past week, we finally got around to making some decorative changes in our master bedroom. The bedrooms have been last on our list in painting and updating, since generally people who come over to our house don't really see them.

Our room previously had three different paint colors on the four walls: two dark, navy blue walls, one dark red/maroon wall, and one white wall. Kind of patriotic, I guess?

Anyhow, like many of the former paint colors in our house, it was dark -- it made a small space look even smaller and cave-like. Our only bedroom window had maroon curtains (already removed here) that didn't block out much light, and no blinds at all.

We went with two different colors (three walls in green, one light brown) and added these bamboo-type blinds and some new curtains. The room looks totally different now. I love it!

We hung the blinds and curtains higher and wider than the window itself to make it look larger. Plus, these curtains actually block out light, so that's always a plus on a sleepy Saturday morning!

Thursday, June 17, 2010

Painting Things Black, Part 2

Our patio set is finally, finally done! We have been working on this for weeks and weeks, so we're excited that it's all over. The set is wrought iron and came from Adam's parents, who have had it for 20+ years. Adam, ironically, has painted it several times in his lifetime. It was quite rusty and all the paint was chipping off.

A close-up of the paint condition:


We sanded using many different tools (but most of all, our favorite Ryobi orbit sander). This took forever, it was messy, and our garage is still coated in dust. Then we primed with a primer made for rusty metal, and painted and painted. But it was totally worth it in the end for this!

And here's how it fits in with the rest of the backyard:

Basically, we enjoy painting things black.

Saturday, June 12, 2010

Sunny Saturday!

So busy lately! We've been gone most weekends over the last month, but now we're finally home for a while so we're back to projects again full time :) Some of our recent trips include Brent's wedding in Boston, Memorial Day weekend at my parents' cabin in Hayward, Wis., and a Roscoe wedding reception. Whew!

The hot, humid weather is no fun for me, but is doing wonders for some of my plants out on the deck.


This morning, I finally finished up a project I started some time ago... last fall, actually. Adam and I didn't have nightstands, and I had been scouring craigslist for weeks for some cheap ones. I found two matching ones for $8 total, but unfortunately they looked like this:


They sat in the shed over the winter, and a couple of months ago I got them out and started sanding. They're not real wood (as you can probably tell from the photo) -- they are pressed wood or particle board or something that's basically glorified plywood. Not the type of thing you'd normally refinish. But, I just wanted something quick and cheap, so I decided to paint them black. Not surprisingly, the outer laminate layer basically fell right off:


Then I primed, painted, and replaced the handles with something nicer. It took longer than expected, but I really like the results:

Stay tuned for the final photos of the patio set I showed Adam working on in the last post--it'll be ready for the outdoors on Monday when the paint is set. It looks AMAZING compared to when we got it. Can't wait to sit outside in the nice weather and use it!

Thursday, December 17, 2009

No more orange!

This week, we finally got rid of the last of the orange by painting over the final wall in our family room. It was so much easier than painting in the kitchen, because there were no cabinets or appliances to have to paint around.

Here is the before picture of the room, again from the realty listing (with the former owners' furnishings, etc.):


Here is our repainted wall (we left the green wall as-is; it's not a bad color, when it isn't paired with orange...):


And another view, including the Christmas tree:


And, of course, Marble is in both pictures. They are both constantly either running around like crazy or lazing around on the coffee table:

Sunday, November 15, 2009

Kitchen updates

After what feels like forever, we've finally finished painting the kitchen!! We even had some help from Lynn one weekend. Here's Adam, hard at work and wearing Lynn's sunglasses in place of safety goggles:

Note the brown and orange walls, which are now gone. Ten points if you know where this T-shirt is from... ten more if you also own one, and also only wear it while painting, to bed, somewhere you won't be seen in public, etc.:


As you can see, we went with a red and tan color scheme for a more updated look. Here is a picture (from the realty listing, before we bought it) with the original paint and appliances:

And here is our newly painted kitchen with new stove:


It's still in need of a few things (like a new countertop and a range hood to match the new oven), but it's sooo much better!