Saturday, September 17, 2011

Who Needs Missoni?

As you may have heard, earlier this week lots of people went crazy for Target's new Missoni line. I am a fan of the chevron patterns that have been so popular lately, and had already decided to use this fabric to make my own curtains for our office. Thanks to an awesome sale, I scored four yards for $35 and created these on Wednesday/Thursday night:

I looove how bright and sunny they look in our office (which until this week has been lacking window treatments completely). I've also got some lime green and gray going on in there... not sure how it'll all look in the end, but hopefully bright and playful and fun (not boring and office-y)!

They did require me to break out the sewing machine, but I'm really a novice, so there was just basic stitching involved. Here's a look at both panels (and the side of our neighbor's house): 

I'd definitely say I prefer them to these Missoni curtains (which are arguably hideous for $40 each). And, of course, sold out.

Saturday, September 3, 2011

Front Door Paint Job

I got the biggest item already checked off my list for this weekend. On Friday, I painted our front door to match our new shutters. As you may remember from that post, the door was really ugly:


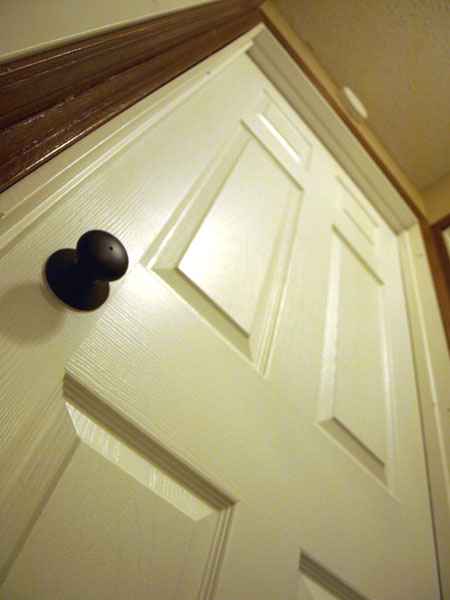
Here it is now with the new paint job:

It's not amazing (it's still a plain, six-panel door), but it does make a big difference on our little house. If you too need to paint a door (or anything else...) here are my tips from this project: 

1. For six-panel doors, it's always good to follow the directions (like Pretty Handy Girl's, here) instead of just painting the whole thing in a random order like I tried to do on the first coat. Things start to dry out of order and you risk pulling up partially dried paint otherwise (super hot weather made this even worse!).

2. Always read the product's instructions before you use it. I was using a Pittsburg Paint exterior product that was supposed to have "paint and primer in one." I read it in the store; it said it was OK for metal. No problem! Then, when I re-read it immediately before using it, it said to "prime metal surfaces with the appropriate primer before using." Oh. That brings us to tip #3...

3. Have lots and lots of tools/paint/brushes/stuff in your house. Seriously, deciding to prime the door at the last minute was no big deal, because I own at least four different types of primer. Yeah, I might have a problem. I ended up using a spray-on oil-based primer, which was awesome — it was easy and I didn't have to clean any brushes!

Probably the most hilarious part of this project was deciding how to take the door off to paint it, since I wanted to lay it flat across sawhorses in the garage while I worked. Leaving a gaping hole in the front of our house for 8 hours was a problem due to bugs, weather, cats, etc., and we currently have no storm door. We ended up taking the door off the back of the garage to put in its place, since it was 100+ degrees yesterday and I needed to keep the AC going. It was exactly the same size and color, so I'm not sure our neighbors even noticed. The hinges were on the wrong side, though, so we just pushed a recliner up against it (from the inside of the house) to hold it up. Somehow, it worked wonderfully!

Friday, September 2, 2011

Contact Paper Window

A couple of weeks ago, I saw this idea and got super excited. We have a door off our kitchen that leads to our backyard and deck. It's a pretty ugly door and it unfortunately faces our neighbor's deck (as does our deck). Frequently I have found myself looking right out our window at our neighbors grilling on their deck whenever I'm doing laundry or getting something out of the pantry. There's really no privacy, even when you are in the house. The window had cheap blinds when we moved in, but the cats soon disassembled them (and they were especially ugly to begin with) so we didn't replace them. So when I saw that I could potentially change this door for just a $6 roll of contact paper, I was thrilled!

Here is the door before, with the view off our deck and into our neighbors' yards:

That is two properties — our next door neighbor's with the light blue deck and the next house over with a red deck. Yikes! 
I followed the instructions (linked above) and cut out many, many, many shapes from contact paper. I ended up splitting up this project over several days so I wouldn't get burned out/have carpal tunnel from the scissors. I only bought one roll of contact paper (it's actually "clear" but shows up frosted on the window). I probably used about half of it. Here's the after photo:


And here's a close-up photo of the pattern: 


I love it! It looks stylish, gives us tons more privacy than we had before, lets in light, and only cost $6. 

Up next is the front door. I'm almost done painting it (coat two is currently drying in the garage!) and it looks awesome. I think it's the nicest paint job I've done yet. Which is great, as it's right on the front of the house and hard to miss ;)

Sunday, August 28, 2011

Front Yard Makeover


This weekend we got lots of work done! In the front yard, we put up new house numbers over our garage door and added shutters on our front kitchen window. It's looking a lot different (to us) than when we first bought the house.

Here's a photo from right before we closed on our house, in September 2009:

And here it is today, August 2011:
 The shutters, exterior lights, trellises for the clematises, and house numbers really make a difference for us. The shutters were surprisingly easy to install. We followed the directions and had them up in under 15 minutes. Super easy!

I have a four-day weekend for Labor Day next weekend, since my company gives us Friday off as well as Monday (awesome!). This means I have lots and lots of plans... we'll see how many get finished. Number one on the priority list, though, is painting the front door — the same dark green color as the shutters. We already bought the paint, so I'm all set! We originally had a screen door on the front door too, but it was damaged beyond repair in a big storm this spring. But once we took it off, we realized how ugly and in need of TLC the front door was.
It probably wouldn't hurt to upgrade our welcome mat, either!

Sunday, August 21, 2011

Installing Our Last Door!

Here it is: our brand new guest room door!


Today we installed our last (new) door! We've been working on this project for over a year, starting with the bathroom door in early 2010. We still had two to go and were able to wrap them up over the last two weekends. Now our office and guest room also have matching six-panel white doors:


On the right, you can see the non-paneled door to our linen closet, which we painted last week after finally finding the correct paint color. We are planning to paint all of the similar closet doors to match instead of tearing them all out, since most of them are not in terrible shape, and it will save money over buying new ones. Here's what they currently look like (this is our kitchen pantry door):


Next, we'll be painting all of the trim white to match! I'm excited for this part (I like to paint stuff), especially since I think we will see a big impact for a low cost.

Wednesday, August 10, 2011

Summer Fun

It's already starting to feel like fall--the last two days have been in the upper 70s instead of the 90s! But we're still wrapping up our super busy summer. We headed up to Rockford on July 23 for Art and Becky's wedding, where Adam reunited with the Posse:


Adam then went to Madison for a few days for a work-related seminar, while I hung out in Roscoe. After that, we headed up to Three Lakes, Wis., for some vacation time with his family. Now we're finally back home and not planning on traveling any time soon... this summer has worn us out. Luckily, other people seem to be traveling in our direction (Anne and Brian, Becky and Sam)!! Which is always super exciting. 

On the home improvement front, we've been stalled for some time due to travel and financial constraints. But now that we're back for a while--and since we've had a long break--we're excited to get started on some more projects. We have two more bedroom doors to install (we've been at this point for... approximately a year. Oops. See our first door installation here). We probably would have had them done by now, but when we went to Menards this weekend, they were sold out of the ones we needed! Instead, we spent last weekend buying paint that matches our existing doors so that we can make the trim the same color. We're also going to try painting some of the doors we don't want to replace: our linen closet, pantry, and entry closet doors.

We're using Pittsburg Paint for these, since that was the brand that the pre-painted doors came with. It matched wonderfully (even though it wasn't exactly the same), so we went with it. Seems to be working so far: 


We did prime before we painted, although we just went with a water-based primer... we decided that the doors weren't "real" wood (they're hollow and plywood-y feeling. Yes, that's the technical term.), so we just winged it with water-based primer, since it's soooo much easier to deal with. The bleed-through hasn't been bad so far (sometimes you can still see wood-colored stains through the paint, unless you use an oil-based product), so I am hoping that it will stay that way. I just finished the final coat of paint on that door, which is for the linen closet, so I am hoping we can put it up tomorrow and see how it looks!

Sunday, July 10, 2011

Back from Vacation

Last week we returned home from our awesome vacation in the Florida Keys. We had a blast! We visited Key Largo, Marathon/the Middle Keys, and of course, Key West. Here we are at mile marker 0, the start of U.S. Highway 1:

If you didn't already see our Facebook album of photos, check out the Shutterfly album I made below (I got it free after writing a TripAdvisor review--yay!).

Click here to view this photo book larger


This month is very busy for us! We'll be attending Adam's cousin's high school graduation party, Art's wedding, and then heading up to Wisconsin to see Adam's parents for a few days.